
 No one wants to have their sensitive data hijacked because of bad web security practices, and securing your web traffic with SSL/TLS encryption to handle HTTPS communications has become an essential part of building any public or private web service, because without it, your web service will have weak privacy and insecure data transfer, and users won’t trust your services.
SSL/TLS encryption protects your data transfer and prevents sensitive data exposure, in addition to ensuring that the connection is between the correct entities by cryptographically verifying that you’re connecting with an authentic server, and that the messages have not been interfered with while being transferred.
The SSL/TLS certificate's job is to initiate secure sessions with the user’s browser via the Transport Layer Security (TLS), which is based on the now-deprecated secure sockets layer (SSL) protocol. This secure connection cannot be established without the SSL/TLS certificate which digitally authenticates a website's identity and tells web users that a connection is safe and secure.
Note: From now on we will refer to SSL/TLS certificates as simply "SSL certificates" for brevity.
In this article, we will show you how to secure your website and protect your customers’ online transactions, by making sure that their sensitive information, such as their credit card number or personal information, are only being transmitted to and from legitimate online businesses like yours, and that they are encrypted.
We will briefly outline the main differences between self-signed and Certificate Authority (CA) certificates. You will configure your Apache or NGINX web server to use a self-signed certificate to encrypt your testing environment and internal data transfer. And you will also learn how to secure both Apache and the NGINX web servers by obtaining and installing a free SSL certificate issued by Let’s Encrypt— a Certificate Authority (CA), which will allow you to communicate and transmit data via encrypted HTTPS connections on your web servers for production.
No one wants to have their sensitive data hijacked because of bad web security practices, and securing your web traffic with SSL/TLS encryption to handle HTTPS communications has become an essential part of building any public or private web service, because without it, your web service will have weak privacy and insecure data transfer, and users won’t trust your services.
SSL/TLS encryption protects your data transfer and prevents sensitive data exposure, in addition to ensuring that the connection is between the correct entities by cryptographically verifying that you’re connecting with an authentic server, and that the messages have not been interfered with while being transferred.
The SSL/TLS certificate's job is to initiate secure sessions with the user’s browser via the Transport Layer Security (TLS), which is based on the now-deprecated secure sockets layer (SSL) protocol. This secure connection cannot be established without the SSL/TLS certificate which digitally authenticates a website's identity and tells web users that a connection is safe and secure.
Note: From now on we will refer to SSL/TLS certificates as simply "SSL certificates" for brevity.
In this article, we will show you how to secure your website and protect your customers’ online transactions, by making sure that their sensitive information, such as their credit card number or personal information, are only being transmitted to and from legitimate online businesses like yours, and that they are encrypted.
We will briefly outline the main differences between self-signed and Certificate Authority (CA) certificates. You will configure your Apache or NGINX web server to use a self-signed certificate to encrypt your testing environment and internal data transfer. And you will also learn how to secure both Apache and the NGINX web servers by obtaining and installing a free SSL certificate issued by Let’s Encrypt— a Certificate Authority (CA), which will allow you to communicate and transmit data via encrypted HTTPS connections on your web servers for production.
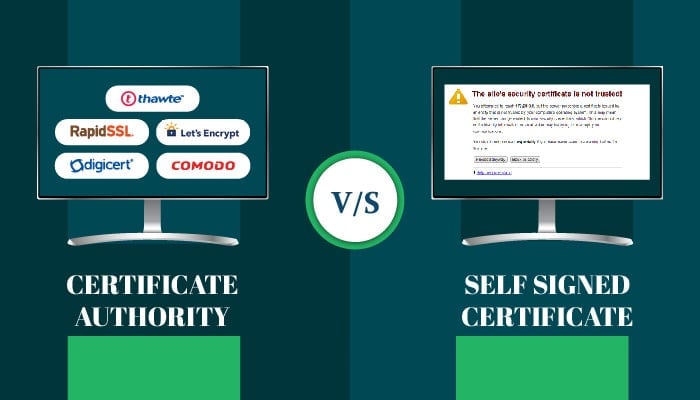
Distinction Between Self-Signed and CA Certificates
In this section, we will briefly outline the main differences between 2 types of certificates you can implement: self-signed and CA certificates. For a comprehensive analysis of both types of certificates, you can check our dedicated blog article: “What are SSL Server Certificates and how do they protect my website?”.- Self-signed certificates are convenient when used in private networks and testing environments.
- CA certificates are suitable for all production public-facing websites and software.
- CA certificates signed by a publicly trusted CA can build trust among website visitors, and establish reputation.
Creating and Installing a Self-Signed SSL Certificate
Step 1) Creating the Self-Signed Certificate
In this step, you will use OpenSSL to create a certificate that will store some basic information about your site, accompanied by an SSL private key file that will be kept secret in the server, and the server then will use it to securely handle encrypted data. OpenSSL is a software library that provides tools for general-purpose cryptography and secure communications. It is used by most HTTPS-based websites, because it provides an open-source implementation of the SSL and TLS protocols. The private SSL key is used by the server to encrypt the content it sends to clients (e.g., web browser) The public SSL certificate is shared publicly with clients requesting the content. So when you request a page, the browser gets the SSL certificate from the server, and uses it to decrypt and access the content signed by the associated private SSL key. The first step to obtaining an SSL certificate is using OpenSSL to create a certificate signing request (CSR). In normal cases, the CSR will be sent to the Certificate Authority (CA) which in turn will create a certificate based on it. In our case (self-signed certificate), we will create the certificate ourselves based on this CSR we generate using OpenSSL. The CSR contains the common name(s) you want your certificate to secure, information about your company, and your public key. In order for a CSR to be created, it needs to have a private key from which the public key is extracted. This can be done by using an existing private key or generating a new private key. Note: It is strongly recommended to generate a new private key when creating a CSR instead of using an existing one. To create a certificate signing request (CSR) and a private key with theopenssl library, you will use the openssl req command with the following command structure:
openssl req -x509 -newkey rsa:<rsa_value> -nodes -out <public certificate path> -keyout <private key path> -days <certificate duration in days> -subj "C=<country code>/O=<organization name>/OU=<organizational unit>/CN=<common name>"-x509: A multi-purpose certificate utility. It can be used to display certificate information, convert certificates to various forms, sign certificate requests like a "mini CA" or edit certificate trust settings.-newkey: Specifies that a new private key should be created with the certificate request.-rsa:: The encryption algorithm you’ll use to generate your key. While you can use other encryption algorithms if you want, RSA is one of the best encryption systems that you can use to protect your data in transmission, especially because it comes with great compatibility. `` represents the key size in bits.-nodes: is not the English word "nodes", it refers, instead, to "no DES". When given as an argument, it means OpenSSL will not encrypt the private key in a PKCS#12 file, and the private key will not have a passphrase. This is important for the web server to have access to the certificate file without needing a passphrase. Otherwise the server would wait for the user to manually enter the passphrase every time the server restarts, which is not convenient.-out: defines the path the public key will be generated to, including the filename.-keyout: defines the path the private key will be generated to, including the filename.-days: The certificate’s lifetime in days.-subj: is used to provide all the necessary information within the command itself, instead of having to provide each required piece of information via command line prompts.Cdefines the two-letter country code where your company is legally located.Odefines the organization’s name.OUdefines the organizational unit name, which can be the name of your department within the organization.CNis the common name, where you either enter the fully-qualified domain name (FQDN) you’ll use to access the server by (e.g., www.example.com), or the public IP of the server.
openssl command options and actions, you can form and execute an openssl command to generate a certificate signing request (CSR) as follows:
sudo openssl req -x509 -newkey rsa:4096 -nodes -out /etc/ssl/certs/ssl-selfsigned.pem -keyout /etc/ssl/private/ssl-selfsigned.key -days 365 -subj "/C=US/O=MyCompany/OU=Technical Department/CN=www.example.com"/etc/ssl/private/: will be the location of the SSL private key file./etc/ssl/certs/: will be the location of your CSR file.
/etc/ssl/private/ssl-selfsigned.key: your SSL private key file./etc/ssl/certs/ssl-selfsigned.pem: your CSR file, which you can use as a self-signed certificate.
Step 2) Configuring Your Web Server to Use a Self-Signed Certificate.
Now that you have your very own self-signed SSL certificate in the form of a CSR file, you can use it to encrypt your data and serve HTTPS requests. To do so, you need to configure your web server to use it. In this step, you’ll learn how to configure and use your self-signed SSL certificate on the two most popular HTTP web servers: Apache, and NGINX.Configuring the Apache Web Server to Use a Self-Signed SSL Certificate
 In this section, you’ll learn how to configure the Apache web server to use your self-signed SSL certificate.
First, open Apache’s default configuration file:
In this section, you’ll learn how to configure the Apache web server to use your self-signed SSL certificate.
First, open Apache’s default configuration file:
sudo nano /etc/apache2/sites-enabled/000-default.conf<VirtualHost *:80>
Define servername www.example.com
ServerName ${SERVERNAME}
ServerAdmin webmaster@localhost
DocumentRoot /var/www/html
</VirtualHost>Continue reading this article
by subscribing to our newsletter.
Subscribe nowby subscribing to our newsletter.
A note about tutorials: We encourage our users to try out tutorials, but they aren't fully supported by our team—we can't always provide support when things go wrong. Be sure to check which OS and version it was tested with before you proceed.
If you want a fully managed experience, with dedicated support for any application you might want to run, contact us for more information.